Wednesday, 1 March 2023

Designing from architecture: the Casa Batlló, Barcelona part one

 Course Work - a valuable resource.

In 2000 - 2001, I studied at Bradford for my HNC in Handwoven Textile Design.  One of the assignments was to explore architecture as a source for inspiration and produce a range of items. The key words were colour and texture.

Having recently visited Barcelona, I was fascinated by the buildings by Gaudi, in particular the Casa Batlló in Barcelona.I chose these buildings for my assignments. 

Robert Hughes in his book 'Barcelona' describes the house thus:

Gaudi ... wanted the Casa Batlló to be read as a symbolic paean to the legend of Saint Anthony, patron saint of Catalunya, in  his victory over the dragon. The building 'represents' the dragon, its lair, its victims and the triumph of St George all in one. The ridged roof, with its interlocking glossy scales, is the monster's back. Below, the curving iron balconies of the intermediate floors, pieced with holes like eye sockets, look like masks and represent the skulls of the victims. Robert Hughes  Barcelona (1992) Pp 513 - 514.


My drawing of the exterior

This beautiful house is a fantastic source of inspiration. The coloured mosaic on the facade is described by Hughes as 'an architectural equivalent to the shifting, luminous crusts of airy and watery colour in Monet's waterlilies.' 


Sample one

This sample is woven in plain weave with 16/2 cotton. The colour inlay areas are randomly placed in the same shed as the plain weave pick, although I tried to refer to the photograph to arrange areas of colours.  The inlay threads are various lengths and are 16/2 cotton in a variety of colours. 
Looking back at this sample I have seen new possibilities for the weave.  A fabric for a jacket might be a future project for me. 


Sample two

This sample is in honeycomb weave.  The background is in 16/2 cotton and the cell outlines are in a thicker cotton - 3/2. I tried to get the sense of colour as well as the three dimensional aspect of the facade. 


This is the sample woven on four shafts. The regular honeycomb shows the colours through the eyelet holes.  


Sample three.

For this sample, I wanted to explore the layered front of the house. 
here is a close up of one of the floors. 
Close up of windows


My sketch of the window and balcony shapes.

I had great fun designing a swatch to reflect this three dimensional facade. This is a honeycomb weave on 8 shafts. 


Front of material showing the lovely distorted cell shapes

This is the weave draft showing the front of the cloth.  I used beige, brown and grey to represent the facade. 

Weave draft showing the front of the material

This is the weave draft showing the reverse of the cloth. There are long weft floats. 


Weave draft showing the reverse of the material.


Sample four.

Park Guell

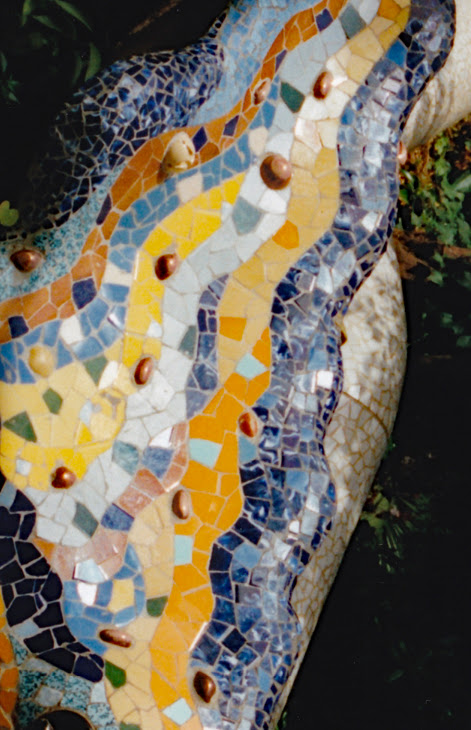
Colour is a feature of Park Guell.  The lizard on the steps is a symphony of colour. 


The wavy stripe pattern was irresistible. 


I used it for the starting point of designing a swatch using inlay techniques. 


From my sketch book.

This weave structure is dukagang. It was an experiment to see how shapes could be made with inlay.  The background weave is threaded straight draft on four shafts. The weft is the same as the warp threads - 16/2 cotton at 32 epi.   The coloured inlay is four strands of the 16/2 cotton. The weave order is 
13 - weft
123 inlay
24 - weft
123 inlay


Sample five 

I also tried a wavy curved twill draft with coloured stripes. The warp is 16/2 cotton bleached white.  The coloured weft is an assortment of thick coloured silk yarns and a white 16/2 silk for the main weft. 


Here is the draft for the twill pattern.


My file of course samples and work is a valuable resource which I am not sure I have fully utilised in the years since I gained my weaving qualification. Looking through my sketch books and samples has really inspired me for further weaving projects.  I hope that you find something of interest as well. 

Happy weaving

Susan J Foulkes.   March 2023

Wednesday, 1 February 2023

Tablet Weaving: weaving a tubular filled cord

 Tablet Weaving

I have been exploring different ways of weaving cords - in particular filled cords that is cords with a central filling core.here is a comparison between two methods of weaving tubular cords. 

Tubular cords without a central core.


Here is a drawdown for a flat woven band.  There are 13 warp ends. 

1. STC heddle

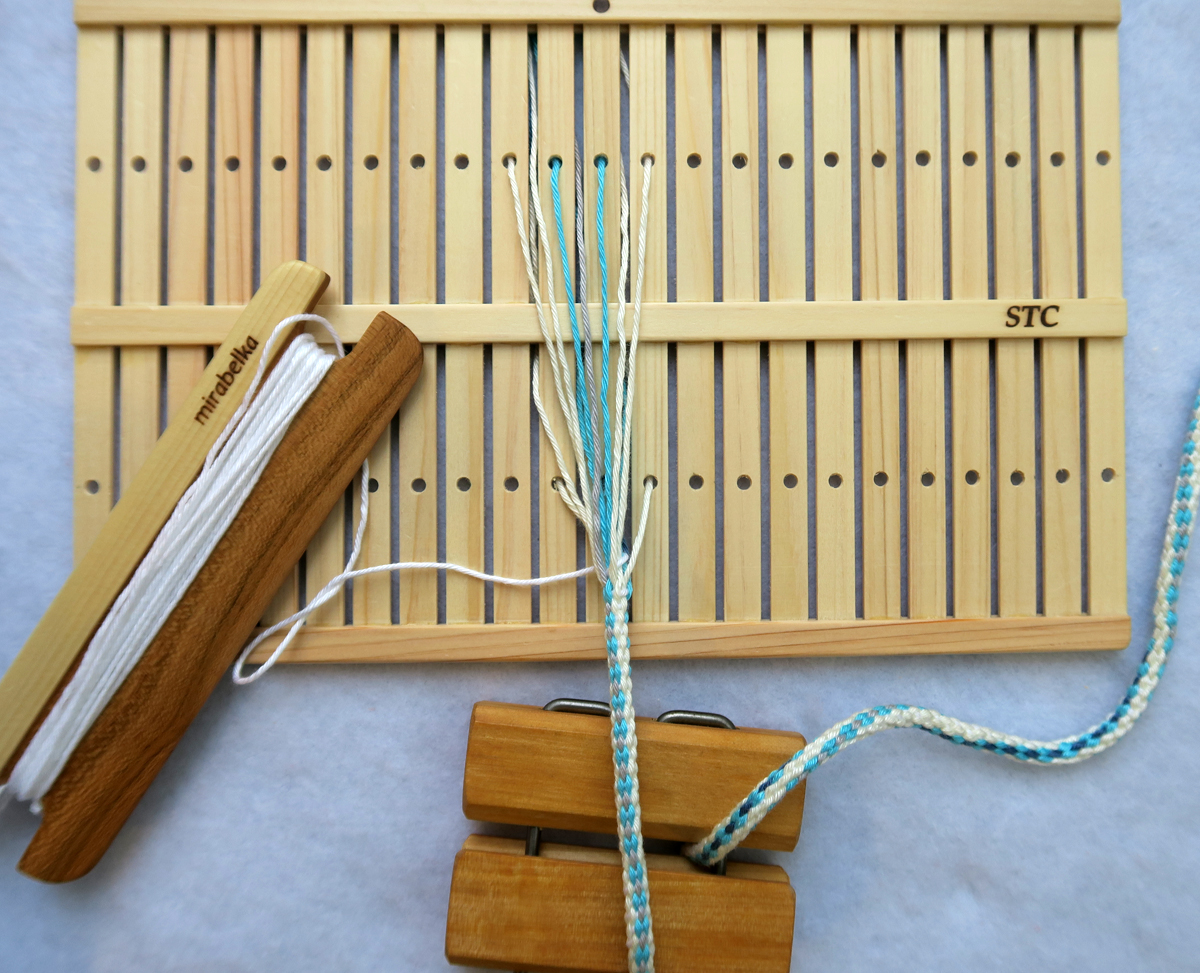
This is a new design of heddle which enables tubular bands to be woven.  Tubular bands can be woven on a four shaft loom and this heddle uses the same weaving technique.  For people without a four shaft loom, this new heddle is a cheaper, easily portable alternative.  UIt can be woven with a backstrap.


With the STC heddle cord and the band loom cord the unwoven warp threads are held horizontally in the same order. However, on the STC heddle the warp is in two layers: a top layer of warp and a bottom layer of warp. 

This is the same method as using a four shaft loom to weave tubular cloth.  Here is the threading chart for weaving a tubular band on the STC heddle.


1st pick: Raising the heddle brings the warp threads in the holes to the top. The shuttle goes from left to right through the top layer.   Top layer on surface: white / blue / blue / white

2nd pick: Raising the heddle brings the warp ends through the slots to the bottom. The shuttle goes from right to left through the bottom layer. Lower layer on surface: blue / blue / white


It is important to start weaving from the left side ( shuttle in left hand) to the right side of the heddle.

3rd pick: Lowering the heddle brings the warp ends through the slots to the top. The shuttle goes from left to right. Top layer on surface: white / grey / white

4th pick: Lowering the heddle brings the warp ends through the holes to the bottom. The shuttle goes from right to left. Bottom layer on surface: white / dark blue / white


Whilst weaving the two warp layers are separate and the band at the point of weaving will show one side of the band. Each layer of warp is horizontal.

Once released from tension, the tubular band will spiral. 


This cord does not have a central core. 

2. Tablet weaving

Using the same warp colours I threaded four tablets with the warp. I used two threads as a central core. The aim is to weave a tubular cord with a central core thread. The core thread is two strands of 3/2 cotton.


There are four cards, each with four holes labelled A, B, C and D. Note that one card only has one thread and the other three holes are empty.


The back post indicates the unwoven end of the warp.  The front post indicates the weaving end of the cord. 


It is very important to thread the cards carefully.  The warp ends in holes A and B must be S threaded. This means that the warp ends are threaded through holes A and B behind the card and emerge in front of the card. 
The warp ends in holes C and D are Z threaded. This means that the warp ends are threaded through the holes from the front of the card and emerge behind the card. 

Core thread.

The centre core of the tubular band is not threaded through any hole although it could be threaded through the square hole in one of the cards.  It will also work if the centre core threads are threaded individually through the square central holes in two of the cards. 

The weave structure is double weave with the top and bottom layers joined together by the spiralling weft. The layers of weaving are warp-faced because the weft is pulled tight so that the warp ends hide the weft and the core threads.

There are only 13 warp threads which means that one card has only 1 warp end.  I found that putting a shaped rod through the centre square hole holds the cards together and prevents the card with only one warp thread falling out of place.  For this threading therefore I did not thread the core threads through the square hole in the cards but left them to go over the centre rod. This rod is tied with a cord so that it will not fall out when weaving.  It can be used as a turning rod.

cards with central turning rod.


Remember as weaving progresses the centre cord will become slack. This slack should be taken up at the far end of the warp. 

The Weaving Sequence. 

To weave, take the shuttle in the left hand and turn the cards so that the A corner is at the top leaving the C corner at the bottom.

Two sheds A and C


 As you can see, this means that there are three layers of warp. The A layer has 3 warp ends. The C layer has four  warp ends. 

1. The shuttle goes through under layer A and then is taken into the right hand. Tug weft to tension. The shuttle returns on top of layer C. Tug weft to tension.
2. Now take all the cards and turn them one quarter turn backwards so that the B corner is at the top leaving the D corner at the bottom. The B layer has three warp ends.  The lower D layer has three warp ends.

Two sheds B and D


3. The shuttle goes through under layer B and is taken into the right hand. Tug weft to tension. The shuttle returns on top of D. Tug weft to tension.
4. Now take all the cards and turn them one quarter turn so that the A corner is at the top leaving the C corner at the bottom.  Repeat.


When weaving, the cord does not show any twist.  Once the cord is released, the twist appears. The weft spirals through the cord when weaving which makes the twist in the woven cord. 

Weaving a flat band

With this threading of the cards you can also weave a flat band. The weaving sequence is different.

1. The shuttle goes through shed A and then is taken into the right hand. Tug weft to tension. The shuttle returns through shed C. Tug weft to tension.
2. Now take all the cards and turn them one quarter turn backwards so that the B corner is at the top leaving the D corner at the bottom. The B layer has three warp ends.  The lower D layer has three warp ends.

Here the sequence changes.  The weft does not join the warp into a circle but goes back without closing one edge. 

3. The shuttle goes through the warp in shed D and is taken into the right hand. Tug weft to tension. The shuttle returns through shed B. Tug weft to tension.
4. Now take all the cards and turn them one quarter turn so that the A corner is at the top leaving the C corner at the bottom.  Repeat.


As you can see, the core floats on the flat band. 

Here is a link to my YouTube video showing this type of weaving with 19 warp ends. 

https://youtu.be/ctJHw7gZZKA


 Here is the drawdown of the band.


This cord has 19 warp ends. This means that one card is threaded with only 3 warp ends. The warp and weft is double knit cotton and the centre core is four strands of 3/2 cotton. 

Here is the threading diagram


The tube is woven in double weave in a warp-faced structure.  The weft and central filling core are hidden by the warp threads. 

Threading the centre core threads.

The core is 4 strands of 3/2 cotton. I have threaded one strand through the square centre hole in card 2, two strands through the centre hole in card 3 and one strand through the centre hole in card 4. (All the core threads could be threaded through one centre square hole if preferred).

Remember as weaving progresses the core thread will become loose. It will need to be tightened at the non-weaving end to prevent it tangling in the warp threads. 

Weaving Sequence.

To weave, take the shuttle in the right hand and turn the cards so that the A corner is at the top leaving the C corner at the bottom.

 As you can see, this means that there are three layers of warp. The A layer has 5 red warp ends. The C layer has four blue warp ends with one empty hole. the centre layer holds the core and all the other warp ends.

The centre filling core is threaded 

1. The shuttle goes through shed A and then is taken into the left hand. Tug weft to tension. The shuttle returns through shed C. Tug weft to tension.

Shed A and Shed C with the centre threads and core
 in the middle

2. Now take all the cards and turn them one quarter turn so that the B corner is at the top leaving the D corner at the bottom. The B layer has five warp ends: red, white, red, white and red.   The lower D layer has five warp ends: blue, white, white, blue and blue.

3. The shuttle goes through shed  B and is taken into the left hand. Tug weft to tension. The shuttle returns through shed D. Tug weft to tension.

4. Now take all the cards and turn them one quarter turn so that the A corner is at the top leaving the C corner at the bottom.

Here is the woven filled tubular cord. 


I hope you enjoy exploring this different method for weaving filled tubular cords. 

Susan J Foulkes  February 2023


Sunday, 1 January 2023

Happy New Year

This year starts with an online workshop about weaving tubular cords with a disc.  I have rediscovered this technique and I will be demonstrating how these tubular cords can be woven. 

Braid  Society Online Workshop January 2023

 Weaving a tubular filled cord with a disc.

Susan J Foulkes

This technique is not well known so I hope that participants will share their experience of weaving and their own exploration of how these cords can be used. The article in Strands October 2022 outlines my own experiences in learning to weave with this equipment. 

weaving a tubular filled cord

The workshop will be available to members of Braids and Bands:


I hope you join us. 


I wish everyone a happy and peaceful New Year.

Susan J Foulkes  2023


Thursday, 1 December 2022

Japanese Lotus bags.


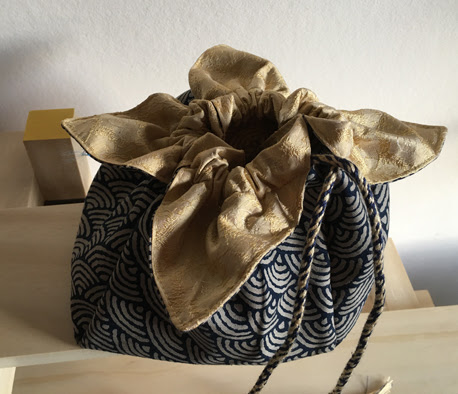
A Japanese Lotus bag with drawstring cords

I have made a few Japanese Lotus bags.  These are very simple to make and make lovely presents.  

I found this lovely tutorial on the web.  This sort of sewing I can do. Very easy and uncomplicated.

https://www.sewingmachinesplus.com/sewblog/lotus-drawstring-pouch-gift-bags-purse-tutorial/

Take two pieces of cloth and put the wrong sides together.  Sew around the edge leaving a small space so that it can be turned inside out.

Now, sew around the edge. Do refer to the web instructions for detailed instructions.. 


Here I have used a small piece of Japanese cloth with a grey silk for the lining. The next stage is to turn in the four corners. These must be accurately measured and pinned in place. 


Here are two bags ready to be sewn.  Sew a straight line across each of the corners.  These form the channels for the drawstring cords. 

The next stage is more difficult to explain.  The corners are folded together and sewn. Then another line of sewing produces the shape of the bag. Be careful not to sew across the openings for the drawstrings. 

Turn the bag inside out so that the lining appears at each corner. 
Sewing a seam from top to bottom 


Three sewn corners.

Now turn the bag inside out so that the lining is now on the inside. 


Completed bags waiting for the drawstring cords. 

I made several drawstring cords using an unusual method. These cords are woven and have a filling so they are very sturdy.  The Braid Society is running an online workshop in January 2023 about weaving tubular filled cords. Do join in if you want to find out more about this mystery weaving disc method. 

https://groups.io/g/braidsandbands


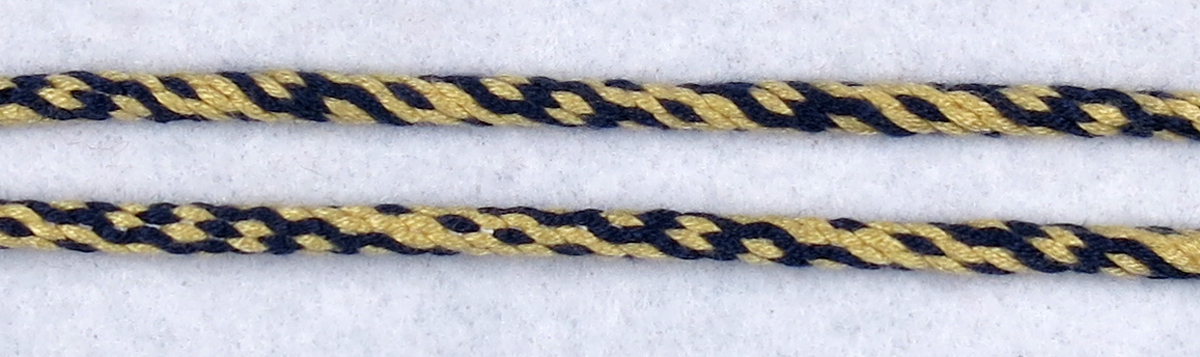
Here is one of the silk cords.  I used 60/2 silk with several strands for each of the 13 warp ends. I used two colours of silk with 13 warp ends.
 2 yellow / 1 blue / 3 yellow / 2 blue / 1 yellow / 1 blue / 1 yellow / 2 blue 


Here is the drawdown with the pattern.  The warp ends are threaded into a circular disc with an additional central core thread. The weft is silk. 


Close up of one of the woven filled silk drawstring cords


The pattern spirals around the cord. I used a different pattern for the second cord. 


Japanese lotus bag with two woven silk cords. The blue material is Japanese and the silk lining is from China.

This type of weaving is unusual and although more time consuming than simply twisting a cord. It can produce an interesting variety of patterns.

Festive greetings

Susan J Foulkes December 2022.

Tuesday, 1 November 2022

Beanies

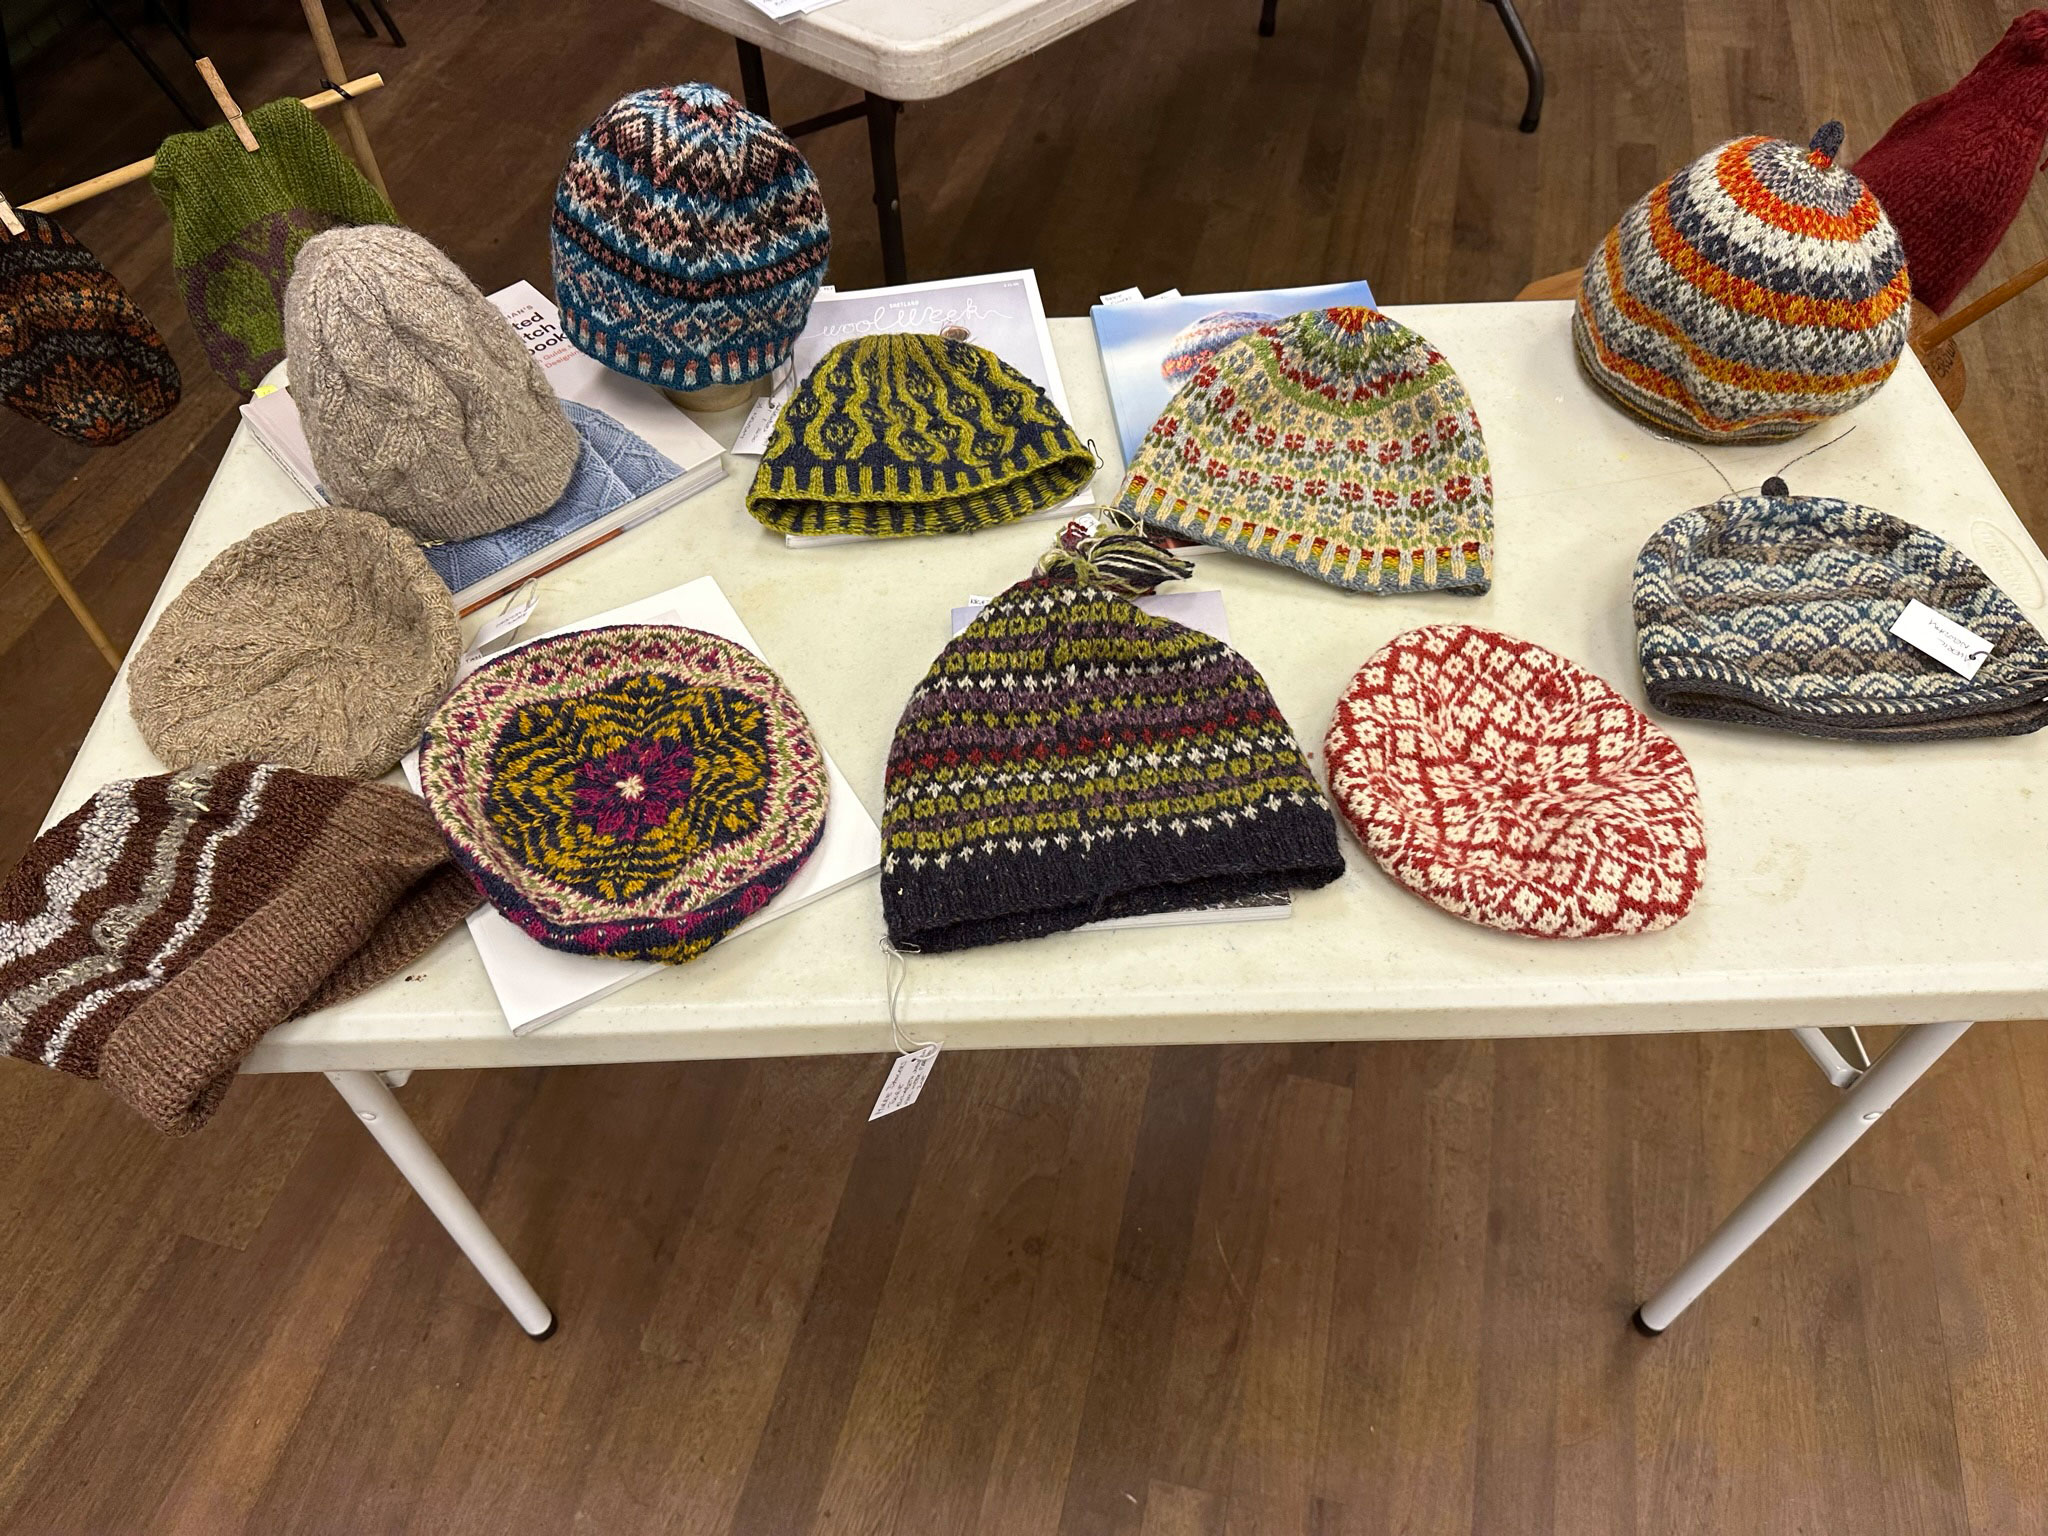
 At our last Guild meeting we had a 'beanie' event.  Members were invited to bring their collection of hand made hats - knitted and crocheted.  I had not heard of an event like this but they are popular around the world.  It all started in Australia. I quote the web site - 'The event began with a 'beanie party' organised by Adi Dunlop.......  The festival was organised to sell beanies crocheted by Aboriginal women in remote communities.' 

Read more at this web site.  

https://www.discovercentralaustralia.com/events/alice-springs-beanie-festival

Our event was more modest but people brought their own 'beanies' and what a lot of stories emerged. 


The hats spread out over several tables and hung on an imaginative stand.


Members who brought hats, talked about the design, method of making, and why they were made. It was fascinating.


Here are some close up pictures.


 I loved this purple creation.


If you have not read this book - do - its a celebration of the older woman.

This was a lovely event and we are thinking of having it every year.  it gives a chance for members to talk about their work and for others to appreciate the creativity and the care in making.  Plus, there were many useful tips for knitters. 


Susan J Foulkes 1st November 2022