 |
| A Japanese Lotus bag with drawstring cords |
I have made a few Japanese Lotus bags. These are very simple to make and make lovely presents.
I found this lovely tutorial on the web. This sort of sewing I can do. Very easy and uncomplicated.
https://www.sewingmachinesplus.com/sewblog/lotus-drawstring-pouch-gift-bags-purse-tutorial/
Take two pieces of cloth and put the wrong sides together. Sew around the edge leaving a small space so that it can be turned inside out.
Now, sew around the edge. Do refer to the web instructions for detailed instructions..
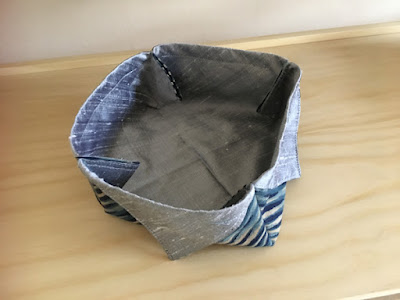
Here I have used a small piece of Japanese cloth with a grey silk for the lining. The next stage is to turn in the four corners. These must be accurately measured and pinned in place.
Here are two bags ready to be sewn. Sew a straight line across each of the corners. These form the channels for the drawstring cords.
The next stage is more difficult to explain. The corners are folded together and sewn. Then another line of sewing produces the shape of the bag. Be careful not to sew across the openings for the drawstrings.
Turn the bag inside out so that the lining appears at each corner. |
| Sewing a seam from top to bottom |
 |
| Three sewn corners. |
Now turn the bag inside out so that the lining is now on the inside.
 |
| Completed bags waiting for the drawstring cords. |
I made several drawstring cords using an unusual method. These cords are woven and have a filling so they are very sturdy. The Braid Society is running an online workshop in January 2023 about weaving tubular filled cords. Do join in if you want to find out more about this mystery weaving disc method.
https://groups.io/g/braidsandbands
 |
| Japanese lotus bag with two woven silk cords. The blue material is Japanese and the silk lining is from China. |
This type of weaving is unusual and although more time consuming than simply twisting a cord. It can produce an interesting variety of patterns.
Festive greetings
Susan J Foulkes December 2022.


I'm grateful for your having exposed me to this style of drawstring bag. But I must confess that despite reading this and the source of its inspiration that you dutifully link to, this quote proves to be quite an understatement: "The next stage is more difficult to explain." Your images are indeed the more useful with identifying where to begin stitching at the outside edge but how does one then determine where the stitching line ends? As with so many aspects of craft, I am diving in headfirst in a spirit of trial and error.
ReplyDeleteand may you have a Merry Christmas
Hi Yes I agree with you. I had to undo the stitching on one bag as it made the bag too shallow. It depends upon the use you want for the bag. I think mine would have made a useful bread roll container but not much use as a bag! have fun
ReplyDeleteSusan J Foulkes