Sunday 15 July 2018

Brasilia


On the plane. 

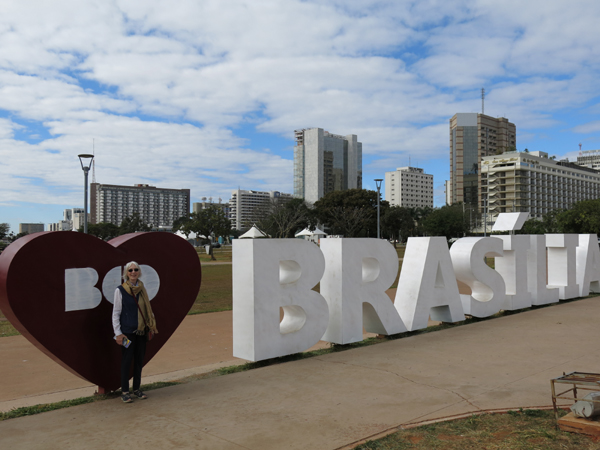
Last month we had a long anticipated holiday in Brasilia.  We are interested in architecture and this city has been a place that we have longed to visit. I was not expecting to see many textiles as the architecture was our focus. However, there were some lovely examples of hand craft which I would like to share with you.


Map of Brasilia.  We stayed at a hotel in the centre (number 4 in the blue area)
Our hotel was in the middle of the main area and had amazing views. It was just what we had hoped for. It was a hotel for business people and conferences.

Daytime view. The building in front is a shopping centre next to the bus station.

The  Palacio do Congresso Nacional is in the distance. At the end of  our guided tour of this magnificent building we were given postcards which we could send for free to anywhere in the world.

View at night showing the illuminated buildings. 


We visited the museum called the Memorial dos Povos Indigenos, another building by Oscar Niemeyer.


An interesting collection of indigenous craft can be seen at this museum. Pottery, basketry and other items were displayed but there was no information in English.


The basketry was gorgeous.

Here is a close up of one of the basketry carriers.

The museum building was designed by Oscar Niemeyer and has a striking central area.


There was a small craft outlet which sells items made by the indigenous people and all profits go to them.  I bought a pair of ear rings make with coiled straw.

Straw earings

We stayed in the central area near the bus station, a very lively place. There are tourist hotels on the outskirts of Brasilia near the lake but we wanted to be in the centre. Brasilia is not fully geared for tourism as it is an administrative capital so postcards and other ephemera of holidays did not seem to be available. However, next to the TV tower there was a wonderful market open at weekends.

Torre de TV


The tower was being renovated but it was still possible to go up to the first level.  This was hosting a fascinating design exhibition. I just wish some of the items had been for sale.


The views were tremendous.


Yes I was really there!


The view from the other direction shows the market area.


The TV tower market used to be at the base of the tower. In 2011 it was relocated to its present position and purpose built accommodation was put in place. There are lots of food outlets as well as a range of local hand crafts.


It was interesting to see that the unofficial market also appears on Saturday mornings.


We were due to fly out on Saturday late afternoon so we walked up to the market early. This is definitely the place to go to see crafts of all kinds. But it was not just for visitors. Several shops sold furniture and two sold fitted kitchens.

These photographs will give you some idea of the range of crafts on sale.


Bags and jewelry.

This store sold musical instruments of all descriptions. An astonishing range of ways to make sound.


These chairs from recycled tyres were very comfortable.


Ceramics and jewellry


Hand made shoes of all types and colours. 


Inlay wood designs


The work on this stall was beautiful. We only took hand luggage so anything we bought had to be small and light. We purchased a set of small pickle forks in different woods.


Some larger items were also for sale!


And of course some textiles.


Friendship bracelets were everywhere. I bought a couple as a reminder of this amazing place. I had to have one in the colours of Brasil.


While we were in Brasilia, World Cup matches were being played.  Here is a picture of a normal day and the traffic.  On Friday morning Brasil were playing a match against Costa Rica.  All the Government offices were closed for that morning.  What a difference! It was like a ghost town. We saw very few people but could here lots of cheers every time Brasil scored.  At the end of the match there was an almighty explosion of noise from cheers and fireworks. Brasil won 2:0.

A normal work day.

The tall buildings in the background are some of the Ministry buildings.

Martin crossing an empty road

A deserted road on Friday morning when everyone was watching the football on television.

We had a wonderful four days.  There was so much to see and there are still some further buildings which we would love to investigate. We will have to go back.

Susan J Foulkes July 2018

I thought that I would add a few more photographs of this wonderful city. The shapes of the buildings and interiors are an inspiration.
Here is a view of the cathedral interior.  The stained glass and the sweeping shapes are awe inspiring;.

Interior of the cathedral with flying angels. 
.
Here are two incredibly photogenic staircases.  Again the sweeping flow of the stairs make a dramatic statement in the open space.
Stairs in the Itarmarty Palace

Stairs in the theatre. 

Unfortunately the theatre is closed to the public apart from the entrance foyer.  The stairs and the indoor garden are breathtaking.

The theatre building is in the form of a truncated pyramid.  On two of the outer walls there is a sculpture called The Sun has Fun.

The Sun has Fun
It was particularly effective and we went back several times to see the different shadows on the walls.

Room divider

This is a room divider in the Itarmarty palace.  I thought that this would be an inspiration for a weave pattern.  I will have to do some work on this idea.

I loved my holiday in Brasilia and would love to go back.

Susan J Foulkes  September 2018

Sunday 1 July 2018

Making a warp and threading the 9 pattern slot heddle.


There are many different ways to make a warp for weaving narrow bands with a rigid heddle.

Warping Frame.

I have a warping frame made by Harris looms in the UK  http://www.emir.co.uk/

This warping frame is very versatile as it can be dismantled. It can be used on a stand or hung on a wall.  The pegs can be unscrewed.  When I am not using it, it hangs flat on the wall.

Some rigid heddle looms like the Kromski harp have an integral warping frame which is ideal.
Another method of setting out the warp is to use two warping pegs attached to a table,  The distance between the two pegs is the length of the warp.


A warping frame from Pinterest
This warping frame is similar to mine but does not have a stand so has to hang on a wall.

Making the warp.


The start of the warp will be the weaving end.  Here the warp is taken around 6 additional pegs as well as the beginning and end pegs.  It would make a very long warp.

The warp plan

The warp plan is very important.  It shows the number of warp ends of each colour and the order in which the warp should be made.


This warp is for a Braid Society workshop. As I am going to be discussing design for patterned bands with 9 pattern threads,  I thought a colourful warp would show the way colour can be used to enhance pattern.

Using the warp plan you can make the warp on the warping frame.

  • Start with the dark red thread.  Tie it to the starting peg. take it around the number of pegs you want for the length of warp. 
  • At the bottom of the frame you need to take the thread over one peg, under the next then around the final peg. This makes one warp thread. Two red threads are needed. Take the warp around the final peg then under and over the next two pegs.  This is the start of the singles cross. Follow the path back to the beginning. 
  • You have now made two warp ends. Tie the thread to the starting peg and choose the red thread.  Continue this process until you have made the warp. 

The singles cross


The singles cross


Note that for this warp, the pattern threads are a single thicker yarn. For the first pattern thread, attach the black end to the starting post. take it around the warping frame. At the final peg leave it hanging.  You can take this pattern thread back around the frame when you come to the second pattern thread on the warp chart.

There are an odd number of pattern threads. The final pattern thread will end up at the non-weaving end of the warp. You will need to  make a loop at the end and slip it over the final peg.


Non-weaving end of the warp


You can see the loop for the last pattern thread on the final peg of the warping frame.


When the warp has been made on the warping frame of using warping posts, the ends should be tied.

Tying the end of the warp 


It is important to secure the end of the warp.  The warp ends should not slip through this knot when you are threading your heddle.

Tying the singles cross


Take the warp carefully off the frame. Now the non-weaving end of the warp needs to be secured for threading and weaving.

Four warps showing the non-weaving end with loop.

Here are four warps showing the non-weaving end.  The loop of strong tape is taken through the end of the warp.  It is this loop of tape which will go over the G-clamp or warping post when you are ready to start weaving.

The Singles Cross

Now look at the four ties for the singles cross.  The singles cross is a guide to the order of the warp threads in the heddle.

four temporary ties


Of course, you cannot leave the ties in place.  Use two sticks or two rulers and place them through the singles cross.

Two cross sticks

Now the ties can be removed safely.


The ties have been removed. Weight the non-weaving end of the warp with a book.

Trim the warp ends at the weaving end so that there are no loops and the warp threads are the same length.


Check the threading chart and divide the warp in half. The centre black pattern thread is in the centre of the picture.  You will need to count the warp threads so that they are divided accurately.

Threading the heddle.

The best position for threading the heddle is to have it held upright.  You can see both sides of the heddle and the warp threads. For the holes you will need a needle threader or the warping lasso which is supplied with the Sunna heddle.

There are different ways of securing the heddle in an upright position.


Using a purpose made stand

It is easier to thread the heddle if it is upright. You can make a stand for the heddle. This is a simple design.  It rests on a non-slip mat.

using two clamps


Here is another way of holding the heddle upright.  The two plastic clamps and the heddle rest on a non-slip mat.


The warp is neatly divided.  Look at your threading chart and then thread the heddle. I always start threading in the centre of the heddle.

Threading Chart


This threading chart is for the 9 pattern slot Sunna heddle.  There are 10 border threads on each side. The final long slot and hole are empty and are indicated in grey.

The background and border threads are 2/6 cotton in five colours.

The pattern threads are a single strand of  2/3 cotton in black.

The weft is the yellow thread so an attractive dotted pattern will show at each selvedge.

Threaded heddles.


Here are some of the threaded heddles. Only two more heddles to thread!


Woven sample


close up of the band sample

This a sample that I have woven for the workshop. The close-up shows the yellow weft at the border. Look closely at the centre of the band to see the pale yellow warp threads next to the centre black pattern thread. the yellow weft shows up at this point adding an interesting variation to the band.


Other ways of making a warp.

Of course, not everyone has room for or needs a warping frame. Here are some very informative and beautifully made set of videos made by a Finnish weaver.

They are very clear for the basics of setting up and starting to weave using a backstrap.

1. Making a warp with a singles cross

In this video the weaver is making a warp with a singles cross.  She is using two chairs to make the warp.  The singles cross is carefully tied so that the ends remain in the correct order for threading the heddle. You do not need warping posts or a warping board.  Chairs make an excellent substiture.


https://youtu.be/TU6vqNxPXtU

2. Another method of making a warp.


In this YouTube video the weaver is making a warp by collecting all lthe warp threads together.  She is cutting the warp ends so that they are all the same length.  She shows how the warp is threaded through the slots and holes of a rigid heddle.

https://youtu.be/pbFzDb5A9ro

3. Threading the heddle.

In this video she is showing how to thread a warp through the slots and holes of the heddle using the singles cross which has been carefully tied after making the warp. She demonstrates how to save a warp so that it does not get tangled.

https://youtu.be/hdAxjribak8

4. Weaving a narrow band using a backstrap.

In this video she demonstrates weaving a simple narrow band.

https://youtu.be/eTFZhfYA9ak

5. Winding the warp onto different shuttles. 

In this video she demonstrates how to wind the weft onto different shuttles and how to start weaving a narrow band.  She weaves a simple band first and then demonstrates how to weave a patterned band

https://youtu.be/Mxu3Rgr5GTg

Happy Warping!

In the months of September, October and November, I will be presenting a series on patterned band weaving with 5, then 7 and finally 9 pattern threads. There will be a free pattern for each session.  I will answer any queries on the blog. If you are interested in learning to weave these lovely patterns do join in.

 These blogs will accompany the publication of my book with Schiffer Press which is due at the end of July in the USA and the end of September in the UK.

Susan J Foulkes July 2018